Visual Editor
Edit your pages visually with the HTML Tree View and drag-and-drop interface.
Visual Editor
The Visual Editor lets you edit your Astro pages visually without writing code. Inspect the HTML structure, drag elements to reorder them, and edit Tailwind classes with intelligent autocomplete.
Opening the HTML Tree View
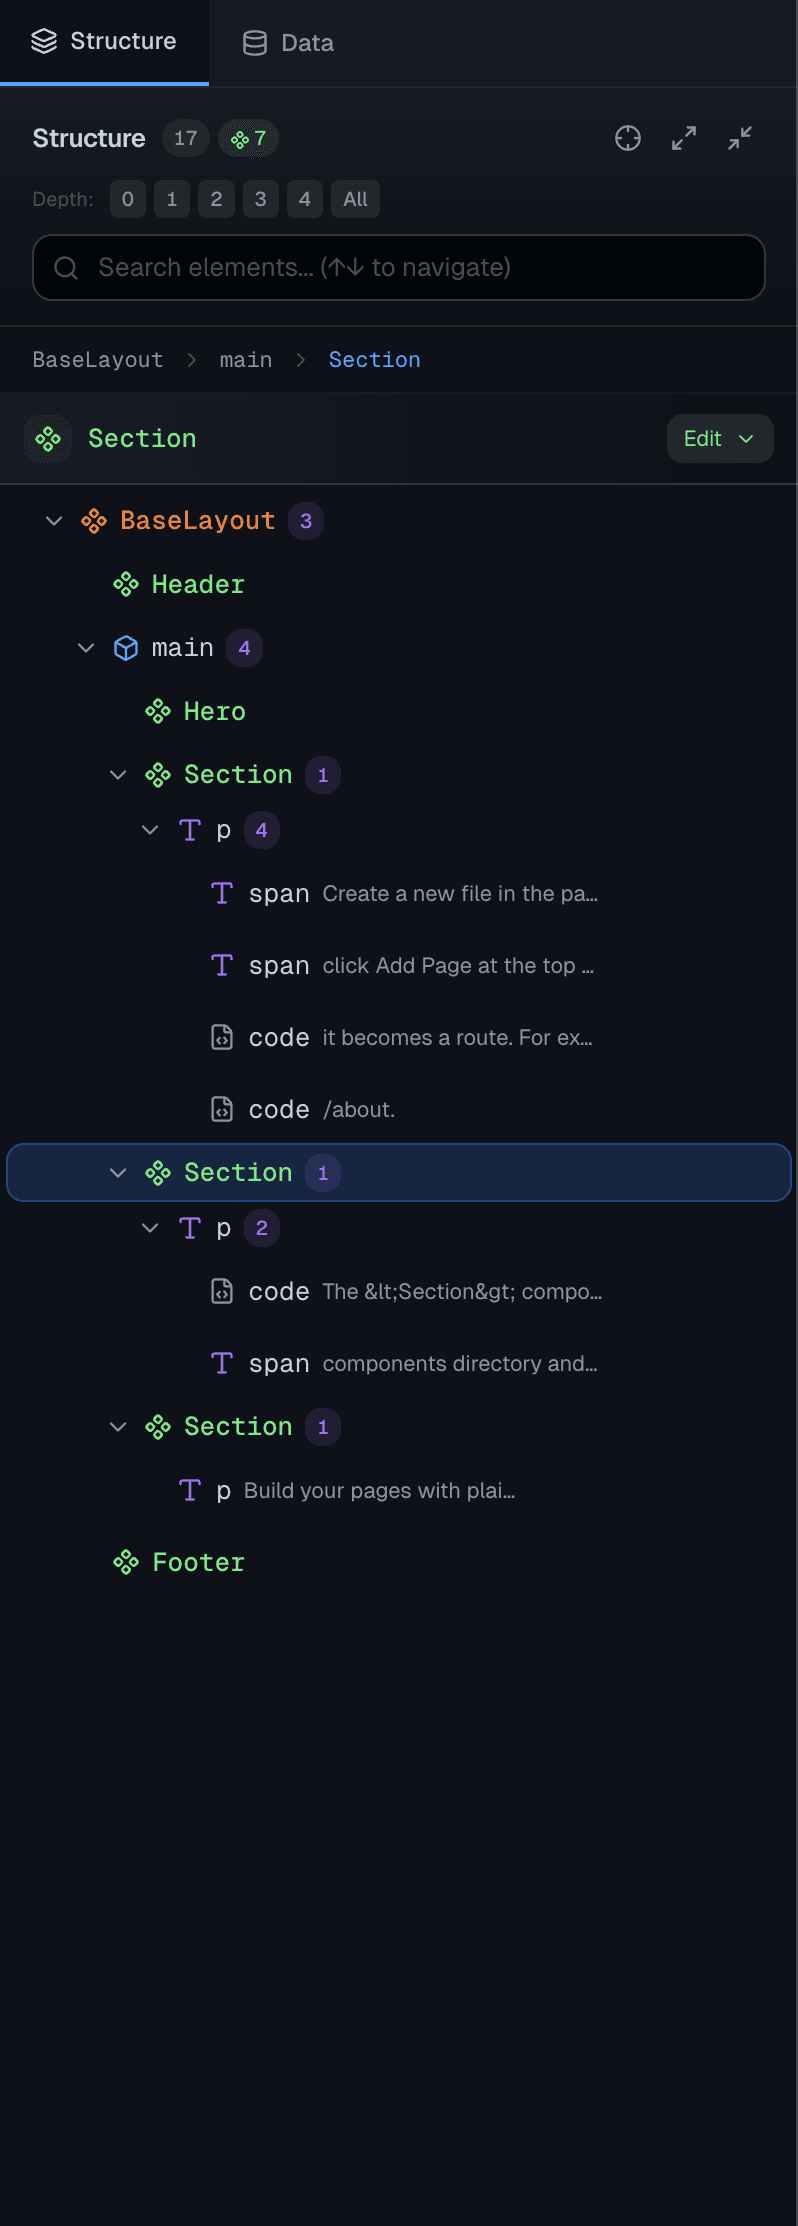
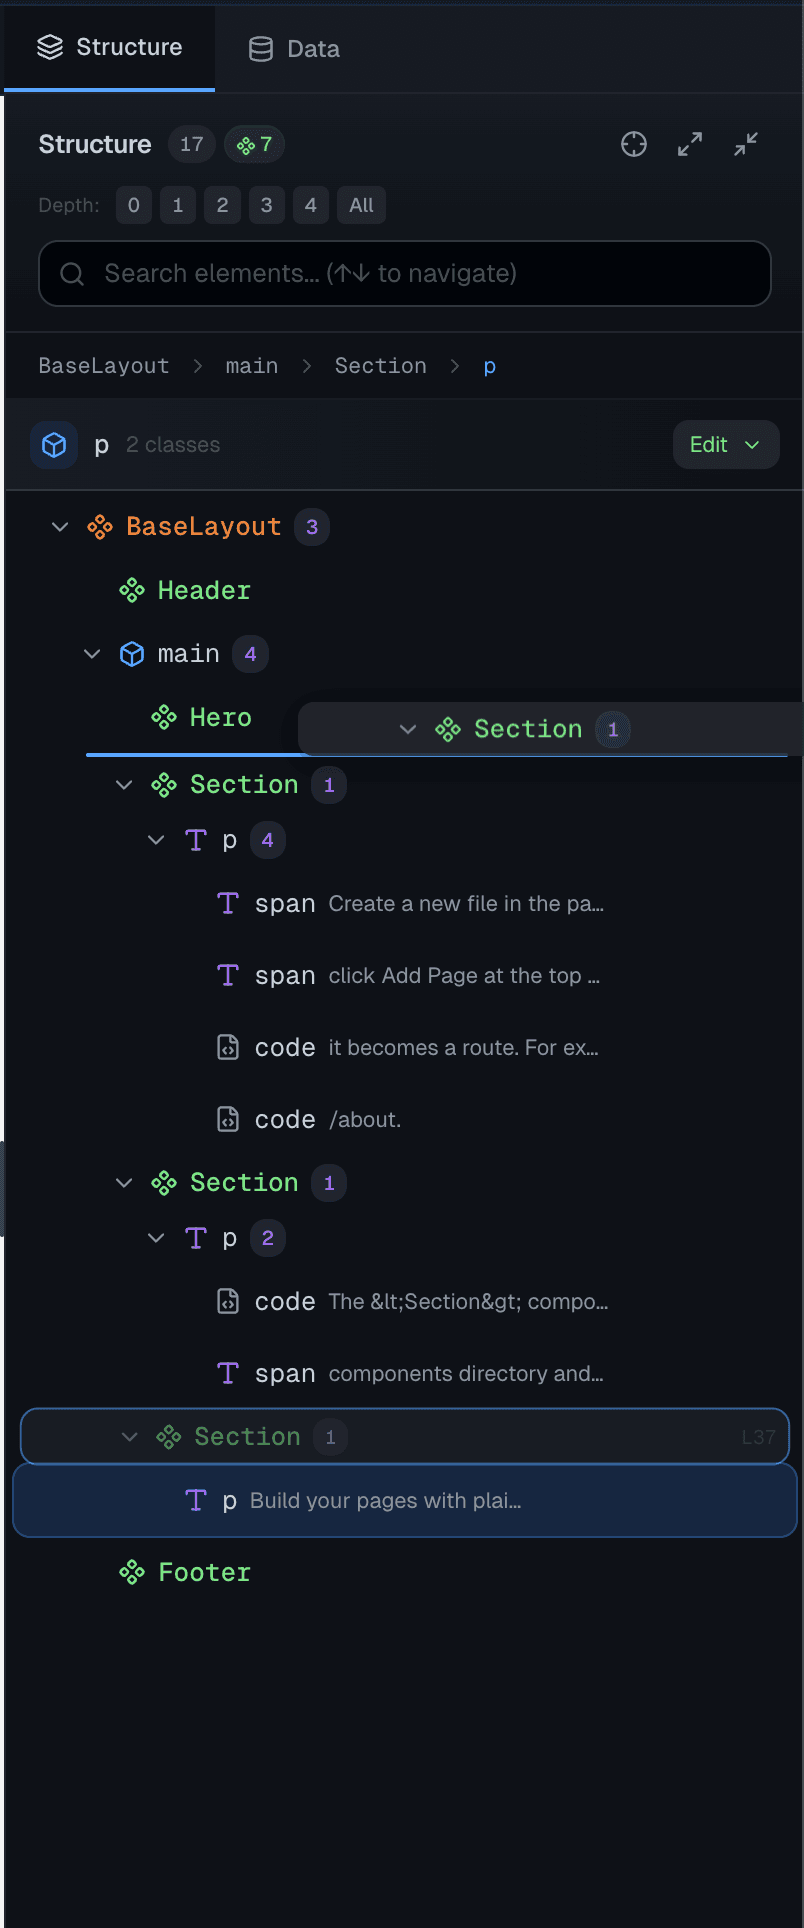
Click the Tree tab in the right panel to open the HTML Tree View. This shows the rendered HTML structure of your current file.
Understanding the Tree
The tree displays your page's HTML structure with visual indicators:
| Element Type | Appearance |
|---|---|
| HTML tags | <div>, <section>, <p>, etc. with blue icons |
| Components | Astro components like <Header /> with purple icons |
| Loops | .map() iterations shown with blue "Loop" badges |
| Conditionals | && or ternary expressions with amber badges |
| Section names | HTML comments like <!-- Hero Section --> shown as labels |
Element Details
Each element shows:
- Tag name - The HTML tag or component name
- Classes - Truncated list of CSS classes
- ID - If the element has an ID
- Text content - Preview of text inside the element
Navigating the Tree
- Click an element to select it
- Expand/collapse nodes with the arrow icons
- Search for elements using the search bar at the top
- Double-click an element's tag name to edit inline
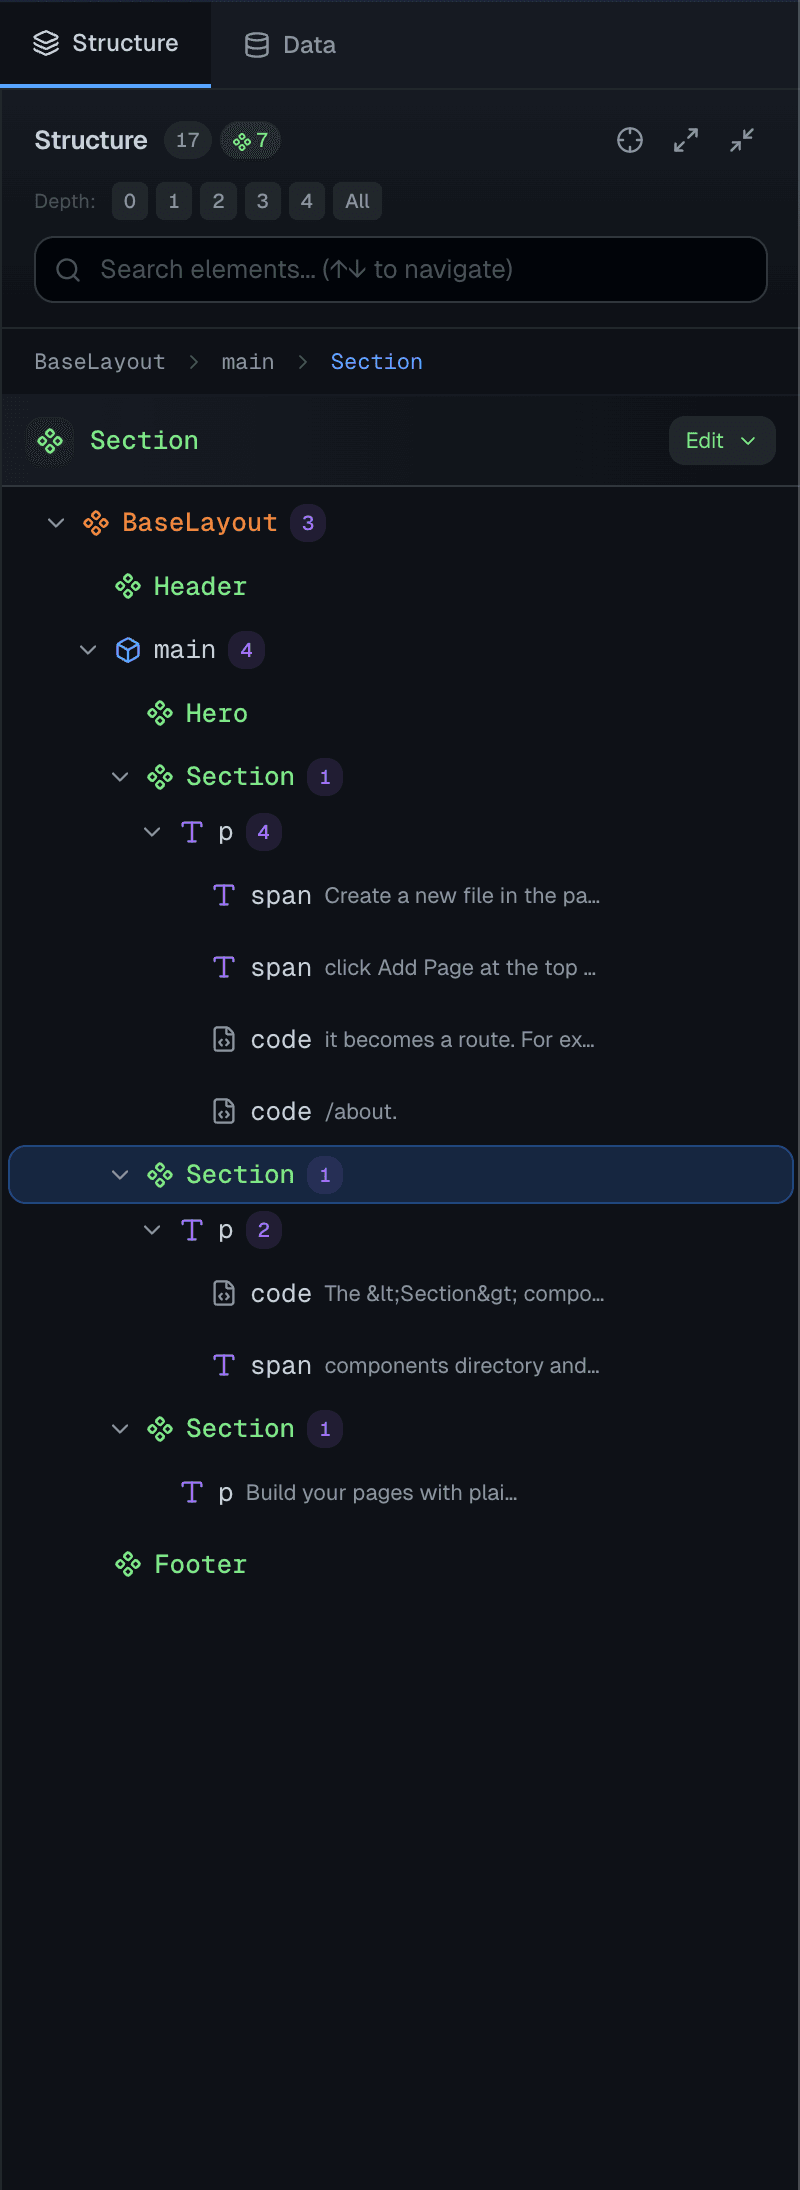
Element Highlighting
When you select an element in the tree:
- The element highlights in the preview pane
- The code editor jumps to that element's line
- The Properties Panel shows editable details

This three-way sync helps you understand how your code becomes HTML.
Properties Panel
When you select an element, the Properties Panel appears at the top of the Tree View. This panel lets you edit the element's attributes directly.
Section Name
Add or edit an HTML comment that appears before the element. This is useful for labeling page sections:
- Right-click an element
- Select Add Section Name or Edit Section Name
- Enter a name like "Hero Section" or "Features"
The comment appears in your code as <!-- Hero Section -->.
Classes
The Classes section shows all CSS classes on the element:
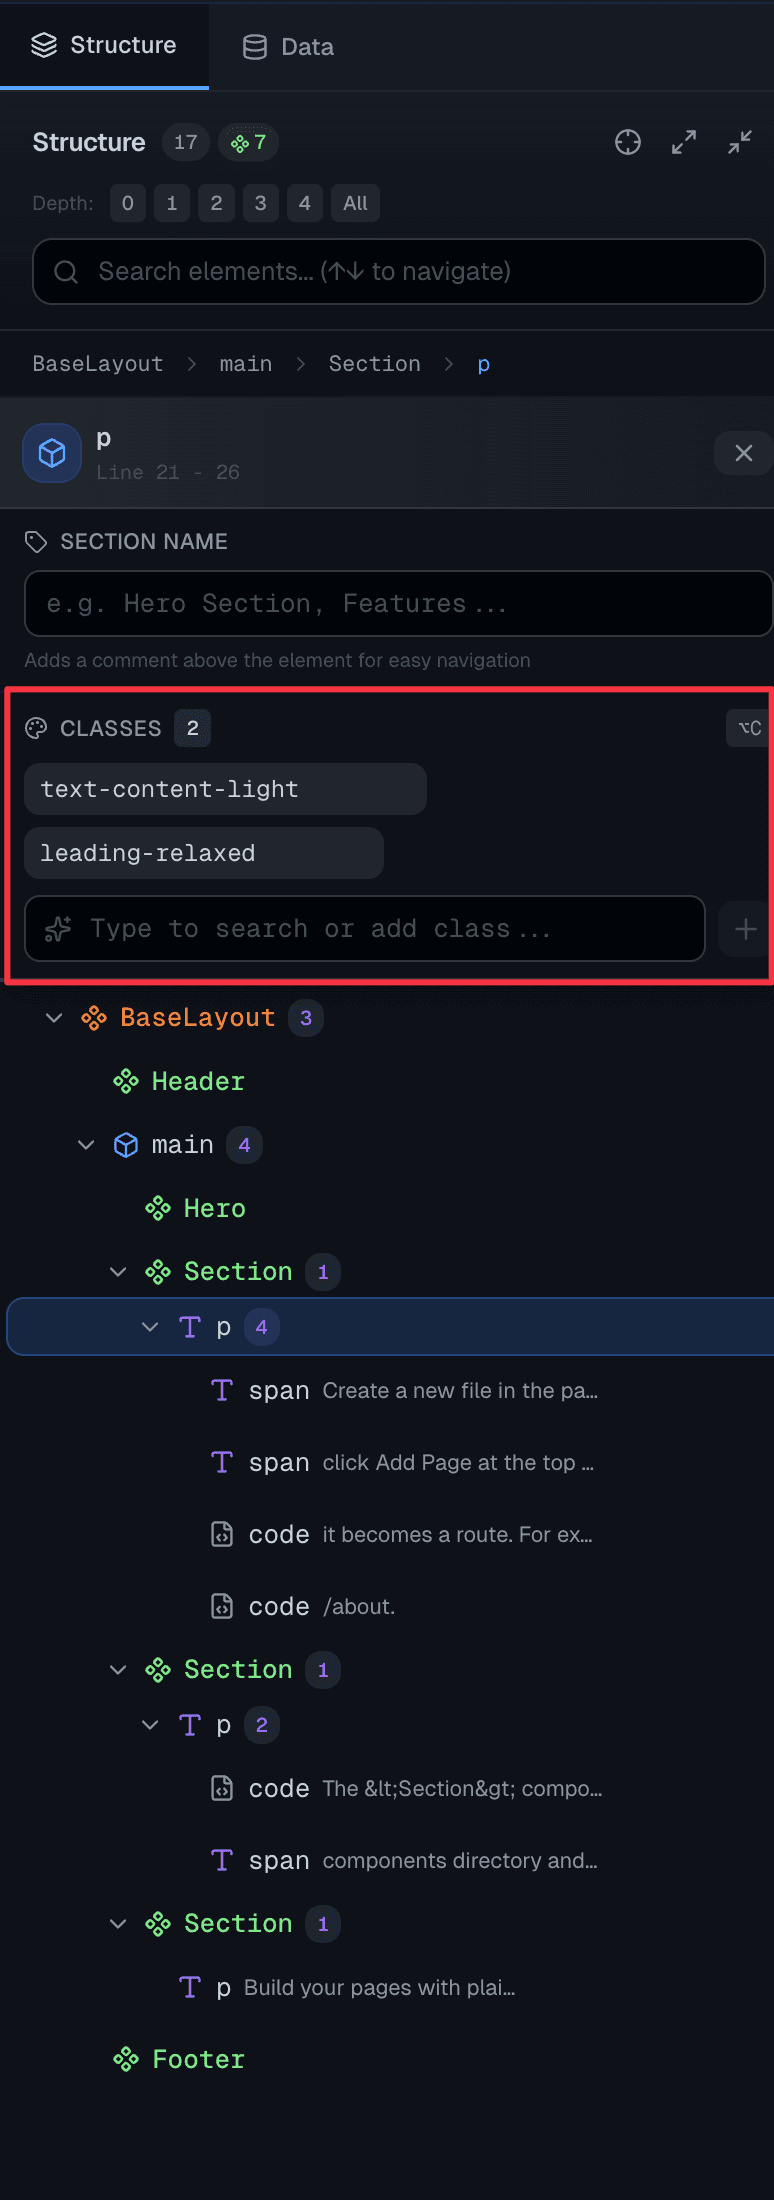
Editing classes:
- Click any class to edit it
- Use the input field to modify or add classes
- Tailwind autocomplete suggests matching classes
- Press Enter to save, Escape to cancel
Tailwind autocomplete features:
- Color swatches - Color classes show their actual color
- Category grouping - Classes organized by type (spacing, layout, etc.)
- Variant support - Includes hover:, focus:, sm:, etc.
Managing classes:
- Click the x on a class to remove it
- Click the eye icon to temporarily disable a class (for testing)
- Click Copy to copy a class to clipboard
- Add new classes by typing in the input field
ID
Edit the element's ID:
- Click the ID field
- Type the new ID
- Press Enter to save
Component Props
For Astro components, the Properties Panel shows available props:
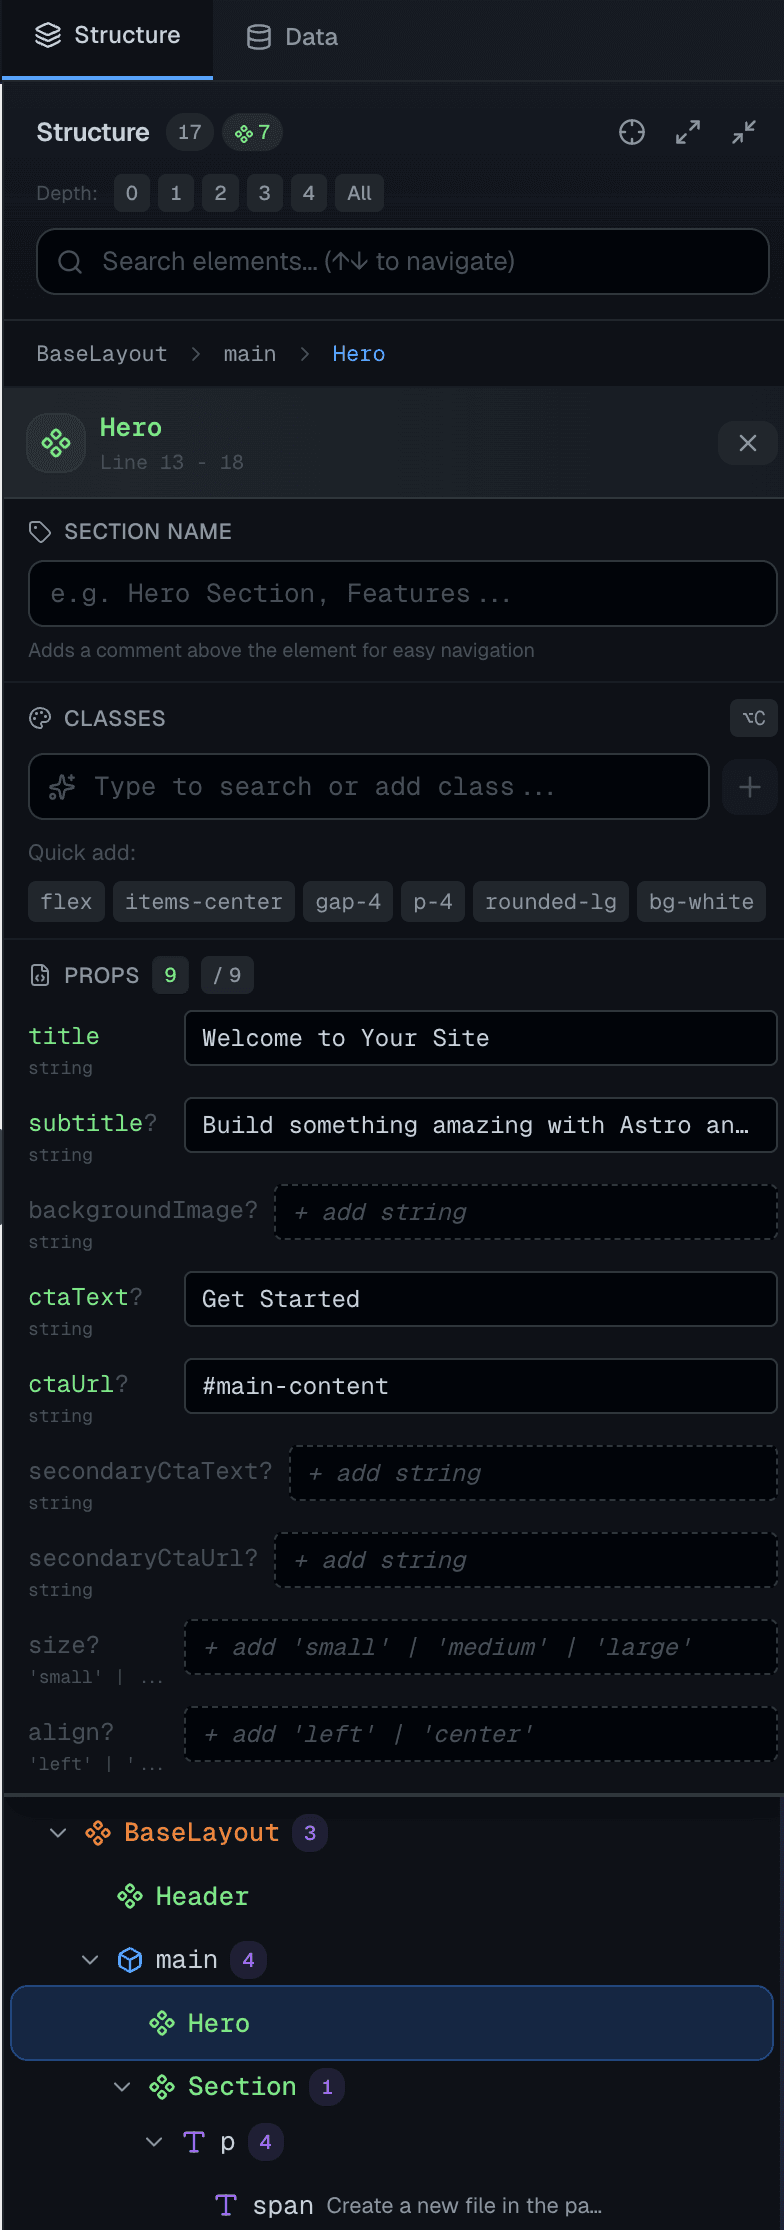
- Defined props - Props from the component's interface with their types
- Current values - Values currently passed to the component
- Boolean toggles - Boolean props shown as true/false selectors
- Add prop - Button to add new props to the component's interface
Drag and Drop
Reorder elements by dragging:
- Click and hold an element in the tree
- Drag it to a new position
- Visual indicators show where it will drop:
- Blue line above - Insert before target
- Blue line below - Insert after target
- Blue background - Insert as child of target
- Release to drop
The source code updates automatically to reflect the new order.
Drag and drop works with HTML elements and components. Loop and conditional elements cannot be moved (you'll see a message explaining why).
Context Menu
Right-click any element for additional options:
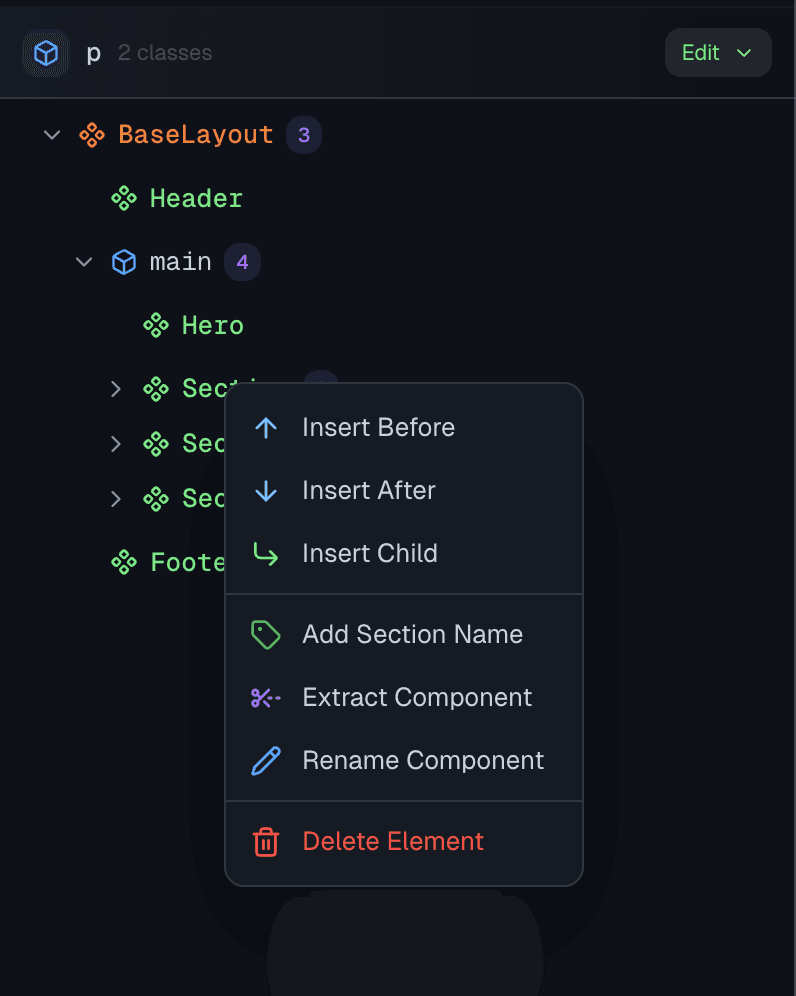
| Action | Description |
|---|---|
| Insert Before | Add HTML before this element |
| Insert After | Add HTML after this element |
| Insert Child | Add HTML inside this element |
| Add/Edit Section Name | Add a comment label above the element |
| Extract Component | Convert this element into a new Astro component |
| Rename Component | Rename a component (updates all references) |
| Delete Element | Remove the element from the code |
Insert HTML
The Insert options open a paste dialog:
- Choose where to insert (before, after, or as child)
- Paste or type your HTML/JSX
- Click Insert to add the code
This is useful for adding new sections from external sources.
Extract Component
Turn any element into a reusable component:
- Right-click the element
- Select Extract Component
- Enter a name for the new component
- The element is moved to a new
.astrofile - The original location is replaced with a component reference
Keyboard Shortcuts
| Shortcut | Action |
|---|---|
Escape | Deselect current element |
Enter | Expand/collapse selected node |
Arrow Up/Down | Navigate between siblings |
/ or Cmd+F | Focus search |
Best Practices
Use for Debugging
The HTML Tree View is excellent for:
- Finding why an element isn't styled correctly
- Understanding component nesting
- Locating elements in complex pages
- Checking which classes are actually applied
Combine with Code Editing
For complex changes:
- Use the Tree View to identify the element
- Click to jump to the code
- Make detailed changes in the code editor
- Preview updates in real-time
Class Experimentation
Use the disable/enable class feature to:
- Test what removing a class does
- Compare before/after styling
- Debug responsive issues
Troubleshooting
Tree Not Showing Content
If the tree is empty or incomplete:
- Make sure the file is saved
- Check that the preview is loaded
- Try refreshing the preview pane
Element Not Selectable
Some elements may not appear in the tree:
- Elements generated by JavaScript after page load
- Content inside iframes
- Content from external scripts
Changes Not Saving
If edits aren't persisting:
- Check for error messages at the bottom of the panel
- Verify the file isn't locked or read-only
- Try refreshing the preview
Next Steps
- Component Library - Add pre-built sections
- AI Assistant - Get help with styling